
Our Online Mosaic Tool makes it super easy for you to create free photo mosaic using your photos in just a few clicks. Just upload, design, and create – it’s that simple. Here are a few simple tips and tricks to really help your photo mosaic to shine.
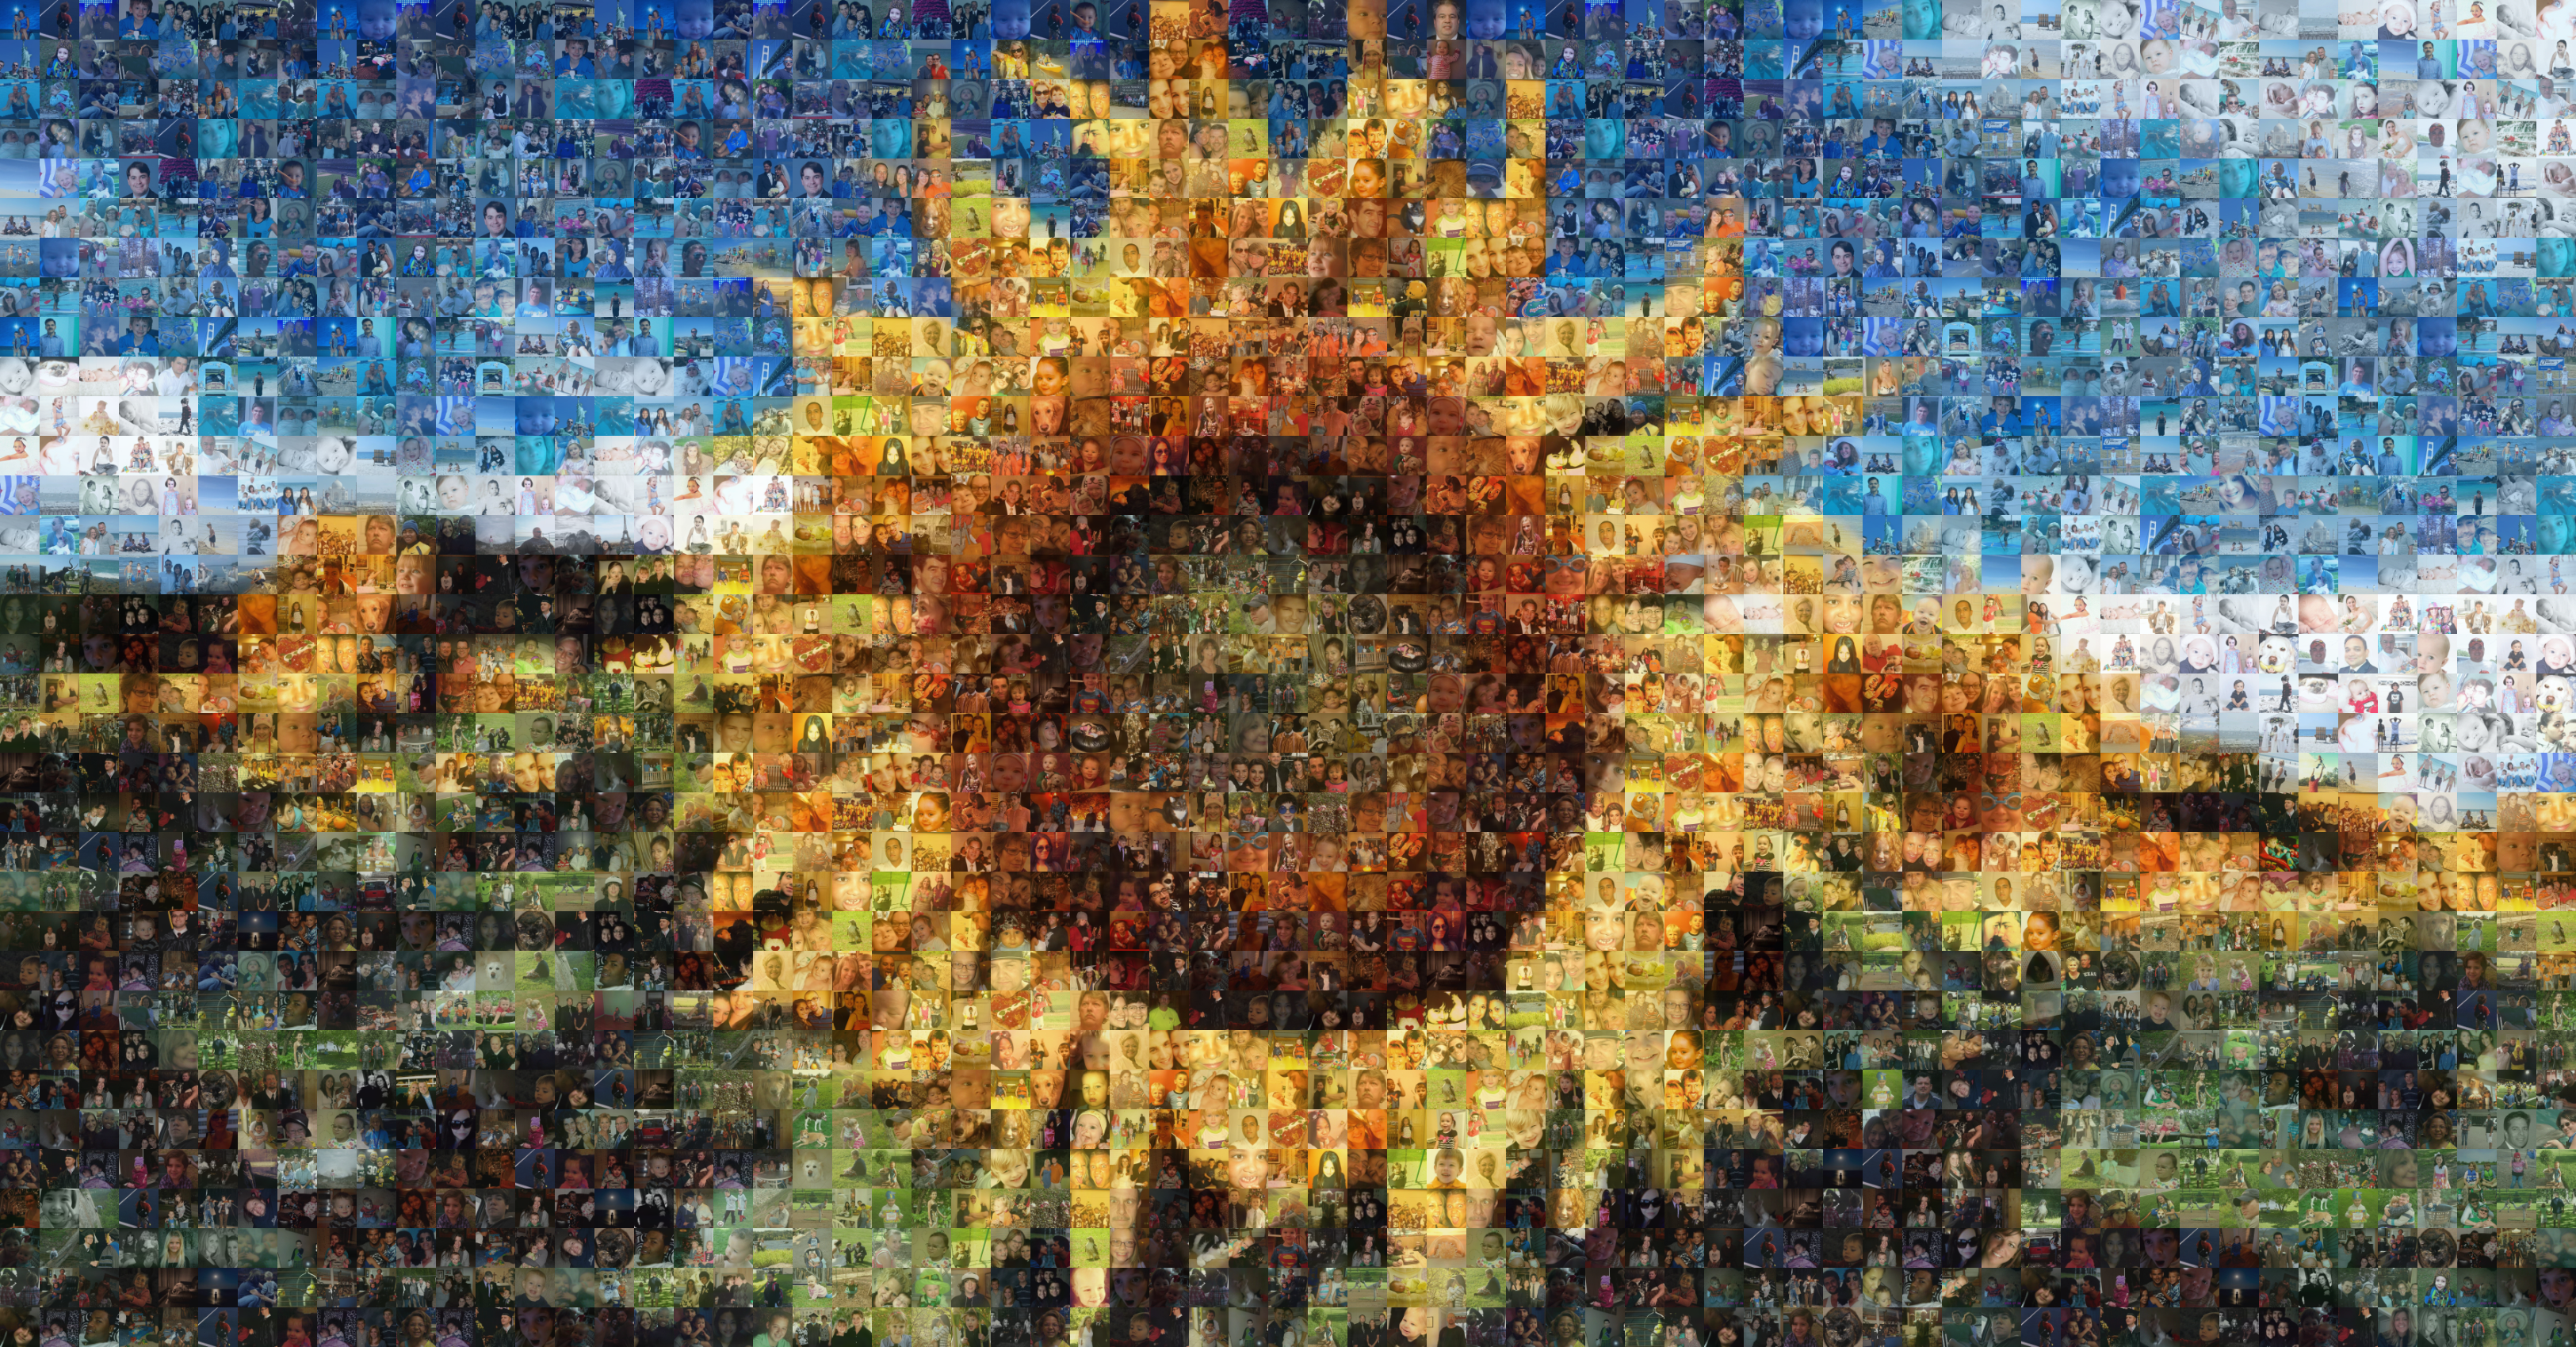
Source Image
I’ve written about this before. Be sure to pick the right source image – keep it simple! If you’re looking for facial recognition, make sure the person’s face spans about a third of the length and width of the entire photo. Logos can sometimes work well, if they aren’t too complex. Our PM Designer service offers a number of custom styles and concepts that can help logo mosaics really come to life.
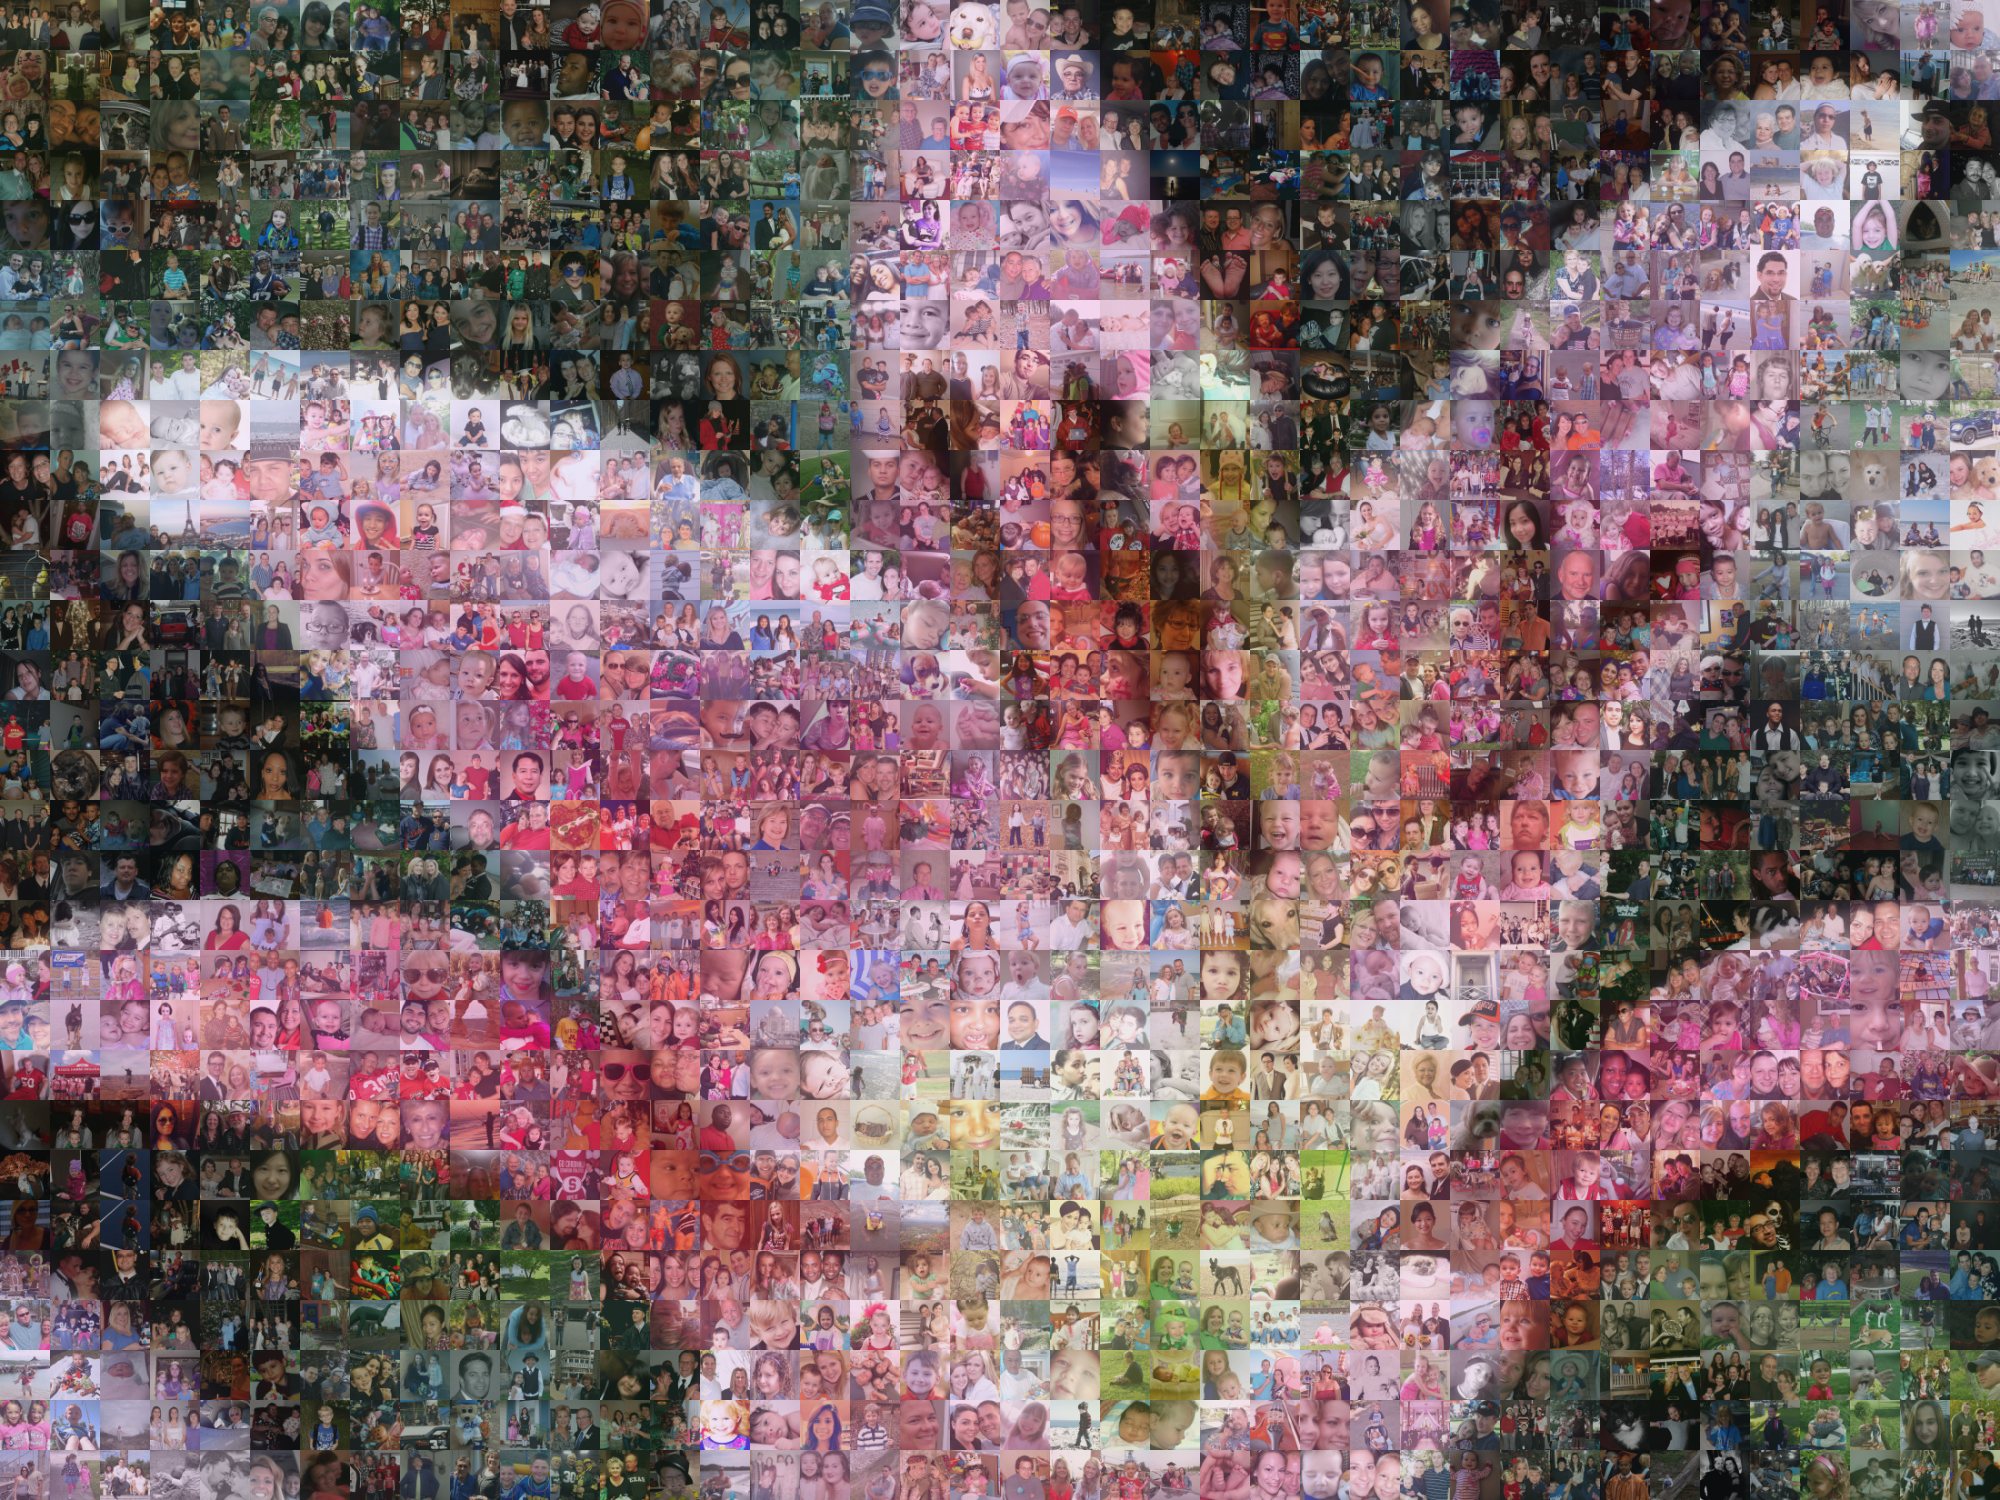
Cell Photos
We recommend using at least 100-150 unique cell photos. This should provide a good variety of colors and shapes, which helps to create a stunning mosaic. If your photos are a mix of different orientations, you can use the cropping tool in the Online Mosaic Tool to make them all the same shape.
Colorization
Colorization and source overlay can be tricky. The key is to find the perfect middle ground where the cell photos aren’t washed out, but the source image still retains its clarity. Your best bet is to explore the settings until you’re satisfied – don’t be shy!
These are just a few tips and tricks to help you along when using our Online Mosaic Tool. As always, if you’re looking for a truly fantastic photo mosaic in a class all its own, our PM Designer service is the way to go. With more than 12 years of photo mosaic design experience, our designers specialize in true photo mosaic design.